
For those of you who I'm connected with on Instagram or Facebook you will have seen an onslaught of posts each day regarding the Spoonflower Design-A-Day Challenge. Each day for 14 days Spoonflower sends out a design technique prompt and you do a design related to that prompt and inspired by the technique for that prompt on the daily blog post/email. At the end of the Challenge Spoonflower selects one of the challenge days to use as the competition theme and then voting will open on that theme over at Spoonflower. Today is day 4 but as it's the weekend we've also got the day 5 prompt today too. Here are my entries for day 1 to 3.....

I got a little carried away with day 3. I have little kids and could see so much potential for library bags, pencil cases and leggings so I went ahead and did a few more colourways.....

I really want to turn it into a real usable font.... add it to my infinite list o things to do right?
Then there's today. I woke up to discover that today's prompt was Block Printing. Yeah, this meant I really needed to do some traditional hands on work to get the right look. But what was I to do? I have proper artist's carving tools and blocks but they are buried in a box after moving house and with the heat there was no way my littlies would let me spend hours in the garage and then do some art un-assisted. OUT CAME THE POTATOES... they're more kid friendly after all I guess, this is the type of printing they do in preschool after all and you know what?

- Short knife with a pointed tip (fruit knife, steak knife or pen knife)
- paper towel
- chopping board
- marker (totally hit an miss as to what works on a damp potato for how long. Maybe a watercolour pencil would be better?)
STEP 1: Cut you potato in half as straight as you can. I used a BIG kitchen knife for this. I want a smooth flat surface as it will show up in your print if it's uneven. Then cut the rounded side off your potato halves so that they will sit flat for carving. You end up with two potato 'discs'

STEP 2: Dry your potato block surface. If you don't dry it a bit, your marker will stop working half way through drawing on your design. It would be best to leave your blocks to air dry overnight but hey, I wasn't going to twiddle my thumbs while my kids behaved... I needed to get shiz done! So I blotted mine with paper towel.

STEP 3: Draw on your design with marker....or maybe a watercolour pencil would work better? My taters were so fresh cut and hence damp that the marker only made it though drawing on the first block and conked out on the second but I felt there was enough line to work with. KEEP IT SIMPLE! It's not all about the detail with this type of printing, it's about effect shapes and the gorgeous textures that naturally come when printing....with potatoes.

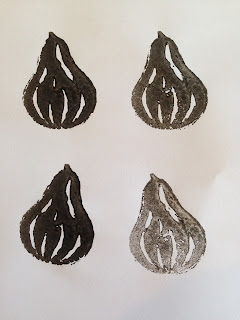
STEP 4: CARVE IT UP BABY! I carefully cut around the outline of my fig (about 1/8" or 4mm deep) then removed the unwanted outside bits. THEN I worked on the finer detail which is a little fiddlier and takes longer so that if I buggered up with the bigger cuts I wasn't wasiting too much of my precious time starting again...Time is sanity when you're a mum of small kids! Don't talk to me about the tortoise and the hare, You KNOW who's side I'm on.


STEP 5: It's time to get printing! Use some paper towel to blot your blocks dry again so your 'ink' isn't too week from potato juice. Then apply a bit of acrylic paint using a kitchen sponge. You want a nice even coverage that doesn't push heaps of paint into your carving or the print won't come out clear/clean. Don't panic though, you can experiment with how much paint you put on and wash it all off if you get a little over-excited OR if one of your own little darlings is helping you and over-does it!Place your 'inked' block straight down onto your paper, give it a bit of even firm pressure and try not to wiggle it or push to hard.


STEP 6: Do lots of prints and have fun. I used mine to make elements which I then photographed and took into Adobe Illustrator and turned into the fabric design below but you can do anything... Make wrapping paper, gift cards, an inexpensive picture in a frame for your in-laws (brownie points for making it look like the kids did it).


I hope this post has inspired you in some way or at the very least given you a bit of a laugh. I think a future post might need to be a tutorial for taking a print on paper into illustrator and creating a final design. What do you think?
Enjoy my lovelies xo
- Pinky xoxox
I got a little carried away with day 3. I have little kids and could see so much potential for library bags, pencil cases and leggings so I went ahead and did a few more colourways.....
I really want to turn it into a real usable font.... add it to my infinite list o things to do right?
Then there's today. I woke up to discover that today's prompt was Block Printing. Yeah, this meant I really needed to do some traditional hands on work to get the right look. But what was I to do? I have proper artist's carving tools and blocks but they are buried in a box after moving house and with the heat there was no way my littlies would let me spend hours in the garage and then do some art un-assisted. OUT CAME THE POTATOES... they're more kid friendly after all I guess, this is the type of printing they do in preschool after all and you know what?
IT'S THE BEST WAY TO ENJOY POTATOES ON A LOW CARB DIET :D ...mum joke!
POTATO BLOCK PRINTING

Here's what you need:
- Potatoes (apples work too or maybe even a large carrot!- Short knife with a pointed tip (fruit knife, steak knife or pen knife)
- paper towel
- chopping board
- marker (totally hit an miss as to what works on a damp potato for how long. Maybe a watercolour pencil would be better?)
HOW TO MAKE A POTAO BLOCK
STEP 1: Cut you potato in half as straight as you can. I used a BIG kitchen knife for this. I want a smooth flat surface as it will show up in your print if it's uneven. Then cut the rounded side off your potato halves so that they will sit flat for carving. You end up with two potato 'discs'

STEP 2: Dry your potato block surface. If you don't dry it a bit, your marker will stop working half way through drawing on your design. It would be best to leave your blocks to air dry overnight but hey, I wasn't going to twiddle my thumbs while my kids behaved... I needed to get shiz done! So I blotted mine with paper towel.

STEP 3: Draw on your design with marker....or maybe a watercolour pencil would work better? My taters were so fresh cut and hence damp that the marker only made it though drawing on the first block and conked out on the second but I felt there was enough line to work with. KEEP IT SIMPLE! It's not all about the detail with this type of printing, it's about effect shapes and the gorgeous textures that naturally come when printing....with potatoes.

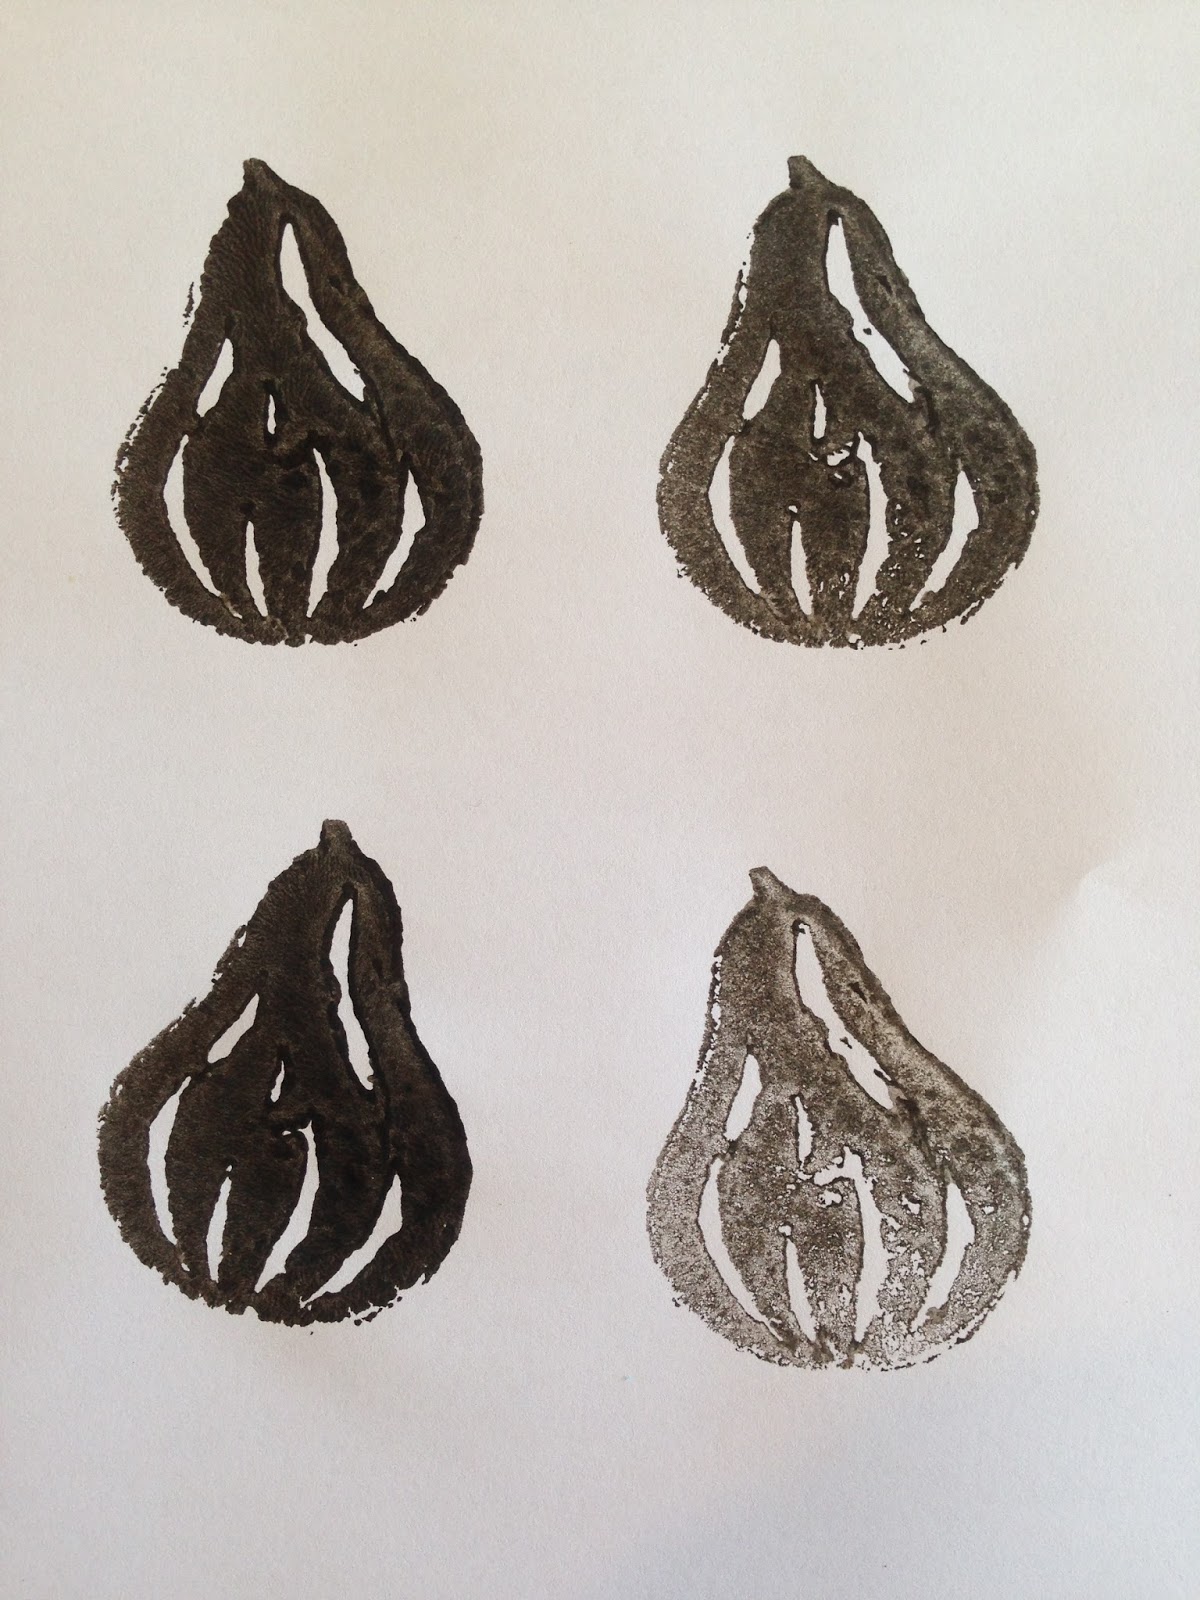
STEP 4: CARVE IT UP BABY! I carefully cut around the outline of my fig (about 1/8" or 4mm deep) then removed the unwanted outside bits. THEN I worked on the finer detail which is a little fiddlier and takes longer so that if I buggered up with the bigger cuts I wasn't wasiting too much of my precious time starting again...Time is sanity when you're a mum of small kids! Don't talk to me about the tortoise and the hare, You KNOW who's side I'm on.

Mmm taters precious!

STEP 5: It's time to get printing! Use some paper towel to blot your blocks dry again so your 'ink' isn't too week from potato juice. Then apply a bit of acrylic paint using a kitchen sponge. You want a nice even coverage that doesn't push heaps of paint into your carving or the print won't come out clear/clean. Don't panic though, you can experiment with how much paint you put on and wash it all off if you get a little over-excited OR if one of your own little darlings is helping you and over-does it!Place your 'inked' block straight down onto your paper, give it a bit of even firm pressure and try not to wiggle it or push to hard.


STEP 6: Do lots of prints and have fun. I used mine to make elements which I then photographed and took into Adobe Illustrator and turned into the fabric design below but you can do anything... Make wrapping paper, gift cards, an inexpensive picture in a frame for your in-laws (brownie points for making it look like the kids did it).

 |
And here's little piccy of what my baby girl got up to when I gave her my used blocks. I'm looking forward to her being old enough to use carving tools but until then she really just enjoys playing with everything and getting messy. There's more paint on her that the paper of course and bit of chewed apple was to distract her from eating the potato blocks.

I hope this post has inspired you in some way or at the very least given you a bit of a laugh. I think a future post might need to be a tutorial for taking a print on paper into illustrator and creating a final design. What do you think?
Enjoy my lovelies xo
- Pinky xoxox
4 comments:
Oooh, I love these! I'll have to try it.
goog, สมัคร D2BET
Ingin mendapatkan info lengkap pada permainan Poker dan Casino dengan mudah, kunjungi situs Joinitu. Dimana tersedia banyak informasi agen judi terbaik yang ada di indonesia, dan tentu dapat memberikan anda manfaat yang lebih mudah mencari info website judi terpercaya. Oleh karena itu jangan lewatkan untuk segera mengujungi situs Joinitu.com.
Agen Poker V ituQQ
Situs Casino Online IndoWinBola | InfoPendek
Trik menang Baccarat Dengan Mudah | InfoJitu
Hack Server Judi Android | CheatPasti
Info Poker Casino Online | Joinitu
Nice post to read. Surely this will help others a lot to know the matter properly. Keep sharing these types of good ideas. Thanx …Cheers….!!
mothers day flowers
Post a Comment